马上注册,结交更多好友,享用更多功能,让你轻松玩转社区
您需要 登录 才可以下载或查看,没有账号?立即注册
×
在很多课程或活动中,我们做过“显示温度”“联网请求”的单点实验,但真正把 联网、数据解析、多线程显示和中断交互 串成一个完整系统,反而并不多见。
此项目记录的是一个基于 RP2040 + ESP32S2 的简易联网气象台项目:RP2040 负责数据处理与界面显示,ESP32S2 作为 Wi-Fi 透传模块,通过串口配合 AT 指令访问高德天气 API,实现多城市天气的实时更新与轮播显示。 01 硬件构成和环境配置 本次活动用到了两块芯片,分别是树莓派的RP2040和ESP32S2-mini1。目标是利用这两块芯片制作一个具有联网功能并可以实时数据更新的简易气象台。可以将ESP32芯片理解为RP2040的扩展,用于连接wifi和发送网络请求指令,两芯片通过串口进行连接,两芯片引脚图分别如下所示: 连接方式为:RP2040的IO12连接ESP32S2的U0RXD,IO13连接ESP32S2的U0TXD,具体实物连接情况如下:

软件方面,本次设计使用的语言为MicroPython,使用的编辑器为Thonny。在进行图片处理的时候使用Python语言进行了编辑。 02 项目整体设计思路和系统框图 在本次设计中,RP2040作为信息处理和显示模块,而ESP32芯片作为一个wifi透传模块运行。具体而言,RP2040通过发送AT指令给ESP32芯片来控制ESP32芯片的运作。借助http协议,发送get指令使ESP32访问到高德天气的API接口并接收返回信息。调用API接口的步骤如下: (1)注册高德天气账号,并拿到用于访问API接口的密钥 (2)发送AT指令给ESP32,使其用GET方法访问到API接口,网址为:
https://restapi.amap.com/v3/weather/weatherInfo?city=city_code&key=key_code,其中city_code和key_code分别是城市的adc编码和私钥。
返回的信息形式如下:可以看到这是一种JSON格式的数据,我们通过MicroPython标准库中的ure库,借助正则表达式从其中提取出所需要的信息并将这些信息整理好存入字典。
负责请求、接收、解析信息的主程序不断循环从接口请求天气信息并更新存有所有城市天气信息的字典。与此同时,负责进行屏幕刷新和显示的线程不断循环读取当前需要显示的城市索引(0、1、2、3、4),其中城市索引counter是一个全局变量。在读取到索引后,索引与上一次循环中读取到的索引不一致,便产生页面交替刷新。当然,还有一种情况会引起界面刷新,那就是当气象状态发生变化时。因此我们设定当当前读取到的天气与上次循环读取到的天气情况不一致时刷新屏幕。每次循环的末尾进行300ms的延迟。因此实际的屏幕刷新周期最高在300ms以上但不超过太多。
我们检测按键的方式为中断检测,在中断响应中改变城市索引counter的值从而引发显示线程对屏幕的刷新操作。
系统总体工作流程图如下:

03 系统连接与初始化 系统初始化包括几个部分,分别是对应引脚的定义、屏幕对象生成、建立新线程、串口的初始化、用指令使ESP32连接wifi等。对应的代码段如下: def main(): #主线程,用于请求和处理信息 global state state = 0 print('on') st7789_res = 0 st7789_dc = 1 disp_width = 240 disp_height = 240 CENTER_Y = int(disp_width / 2) CENTER_X = int(disp_height / 2) print(uos.uname()) spi_sck = machine.Pin(2) spi_tx = machine.Pin(3) spi0 = machine.SPI(0, baudrate=4000000, phase=1, polarity=1, sck=spi_sck, mosi=spi_tx) # print(spi0) display = st7789.ST7789(spi0, disp_width, disp_width, reset=machine.Pin(st7789_res, machine.Pin.OUT), dc=machine.Pin(st7789_dc, machine.Pin.OUT), xstart=0, ystart=0, rotation=0) display.fill(st7789.BLACK) Info = {} # 屏幕初始化 _thread.start_new_thread(disp, (display,)) # _thread.start_new_thread(state,(1,)) uart = UART(0, baudrate=115200, tx=Pin(12), rx=Pin(13)) time.sleep_ms(2000) # uart.write('AT+RST\r\n') # time.sleep_ms(100) # data=uart.read() # print(data.decode('utf-8')) while True: #设备初始化 try: uart.write('AT+CWMODE=1\r\n') time.sleep_ms(100) data = uart.read() print(data.decode('utf-8')) # uart.write('AT+CWJAP="HUAWEI-10EU7K_Wi-Fi5","88340087ff"' + '\r\n') # uart.write('AT+CWJAP="HUAWEI-0E1V5G","88340087ff"' + '\r\n') uart.write('AT+CWJAP="tingyu","555666777"' + '\r\n') #设置模式并连接wifi time.sleep_ms(1000) data = uart.read() print(data.decode('utf-8')) uart.write('ATE0\r\n') time.sleep_ms(20) data = uart.read() print(data.decode('utf-8')) time.sleep_ms(1000) # 串口初始化 state = 1 break except: pass time.sleep(1) global all_city_info all_city_info = {}在初始化后我们需要进行的是城市信息的初次写入,包括请求和整理存储: for key, value in config.city_code.items(): all_city_info[key] = {} for key, value in config.city_code.items(): #除此请求城市气象信息,所有的城市信息必须收集完整才算是载入完成 while True: try: info = Get_info(uart, value) print('here') city_info_compiled = Info_compile(info) print(city_info_compiled['temperature']) all_city_info[key] = city_info_compiled break except: pass print('ready') state = 2对应城市信息获取的代码如下: def Get_info(uart, city_code): ''' :param uart:串口对象 :param city_code: 城市adc编码 :return: 返回的信息 ''' uart.write( f'AT+HTTPCLIENT=2,0,"https://restapi.amap.com/v3/weather/weatherInfo?city={city_code}&key=af6ab7042eb95c635473e4863cf1ef95",,,2\r\n') start = time.ticks_ms() while (time.ticks_diff(time.ticks_ms(), start) < 30000): city_info = uart.read() if (city_info != None and len(city_info) >= 100): print(city_info.decode()) break return city_info.decode()对应城市信息处理和存储的代码如下: def Info_compile(city_info): ''' :param city_info: GET指令返回的信息 :return: 以字典形式整理好的城市气象信息 ''' city_info_compiled = {} temperature_search = ure.compile(r'"temperature":"(.*?)"') #从GET返回的响应信息中,应用正则表达式匹配相应的关键字信息从而找到所需要的气象信息 humidity_search = ure.compile(r'"humidity":"(.*?)"') weather_search = ure.compile(r'"weather":"(.*?)"') windpower_search = ure.compile(r'"windpower":"(.*?)"') reporttime_search = ure.compile(r'"reporttime":"(.*?)"') reportime = reporttime_search.search(city_info).group(0) windpower = windpower_search.search(city_info).group(0) temperature = temperature_search.search(city_info).group(0) humidity = humidity_search.search(city_info).group(0) weather = weather_search.search(city_info).group(0) weather = weather[11:-1] if weather in config.weather_table.keys(): # print(config.weather_table[weather]) weather = config.weather_table[weather] # print('here1') else: weather = 'sunny' print(weather) temperature = temperature[15:-1] humidity = humidity[12:-1] windpower = windpower[13:-1] reporttime = reportime[14:-1] city_info_compiled['temperature'] = temperature #存入字典 city_info_compiled['humidity'] = humidity city_info_compiled['weather'] = weather city_info_compiled['windpower'] = windpower.replace('≤3', '<3') city_info_compiled['reporttime'] = reporttime return city_info_compiled在获取城市的的信息时,发送带有城市编码的AT+HTTPCLIENT指令,由于等待指令的响应和网络请求本身需要时间,我们设计一个定时器,在一个固定的时间阈值范围内不断读取串口数据,直到串口中存在数据且数据长度正确为止(有时响应到的信息不完整)。将获取到的字符串形式的信息通过正则表达式进行字符串匹配,提取对应的关键字信息存入all_city_info。初次请求时会遍历五个城市的请求,直到所有城市的结果准确无误地被存储在all_city_info中,方可进入下一阶段(此时标志显示线程运作状态的state变为2,表示可以进行主界面的显示)。 04 初始化完成之后 能够正常显示主界面之后,我们每隔一段时间循环重复请求五个城市的气象信息。请求并不总是畅通无阻,有时也可能出现数据不全的错误。但这并不重要,因为我们只需要让请求不顺利的时候不修改字典中存储的数据就可以了。数据不更新,但并不影响原来数据的显示,具体代码如下: while True: #后续循环更新气象信息,如果出现错误直接pass,如此循环 for key, value in config.city_code.items(): try: info = Get_info(uart, value) # print('here') city_info_compiled = Info_compile(info) # print(city_info_compiled['temperature']) all_city_info[key] = city_info_compiled except: continue print(all_city_info) time.sleep(10)05 显示线程的工作 为了增强系统的运行效率,我们充分利用了RP2040的硬件资源进行双线程工作。主线程与显示线程互不干扰,大大增强了时效性。显示线程以300ms为周期进行循环,每次循环均要读取表征系统状态的state、城市索引counter和由主线程提供的当前气象信息。表征系统状态的state可以控制显示线程显示初始化界面还是正常的气象台界面;城市索引counter则决定了屏幕当前要显示哪个城市的信息。每次读取state、weather_info和counter后需要与前一次循环的量进行对比,若产生变化则需要将屏幕先变为黑色之后刷新为其他界面。这个线程的主要代码如下: def disp(display): #显示线程需要执行的任务 ''' :param display: 屏幕显示对象 :return: ''' global state, all_city_info, counter, city_idx counter = 0 now_counter = 0 past_counter = 0 cnt = 0 now_state = 0 past_state = 0 past_all_city_info = {} now_all_city_info = {} # BTN_A=Pin(6,Pin.IN,Pin.PULL_UP) # BTN_B=Pin(5,Pin.IN,Pin.PULL_UP) # BTN_A.irq(trigger=BTN_A.IRQ_FALLING,handler=INT_A) # BTN_B.irq(trigger=BTN_B.IRQ_FALLING,handler=INT_B) while True: now_counter = counter now_state = state if now_state == 0: display.text(font2, f'Initializing...', 10, 10) #向ESP32芯片发送初始化命令期间的屏幕显示内容 elif now_state == 1: if past_state == 0: display.fill(st7789.BLACK) display.text(font2, f'done!', 10, 10) #开机后初次请求城市信息期间屏幕显示的内容 display.text(font2, f'loading info...', 10, 40) elif now_state == 2: now_all_city_info = all_city_info if past_state == 1: display.text(font2, f'done!', 10, 70) #城市信息载入完成,开始显示主界面 time.sleep_ms(1000) display.fill(st7789.BLACK) if ((past_counter != now_counter) or (past_all_city_info != now_all_city_info)): #屏幕刷新条件:1、气象信息改变 2、按键中断发生 display.fill(st7789.BLACK) display.text(font2, city_idx[now_counter], 10, 10) display.text(font2, all_city_info[city_idx[now_counter]]['temperature'], 10, 40) display.text(font1, "o", 50, 40) display.text(font2, "C", 60, 40) display.text(font2, 'Rh:' + all_city_info[city_idx[now_counter]]['humidity'] + '%', 10, 70) display.text(font2, all_city_info[city_idx[now_counter]]['weather'], 10, 100) display.text(font2, 'windpower:' + all_city_info[city_idx[now_counter]]['windpower'], 10, 130) LOCAL_TIME = utime.localtime() # 请求时间 HOUR = '{:02d}'.format(LOCAL_TIME[3]) MIN = '{:02d}'.format(LOCAL_TIME[4]) display.text(font2, f'{HOUR} : {MIN}', 50, 170, st7789.GREEN) display.text(font1, 'reporttime' + all_city_info[city_idx[now_counter]]['reporttime'], 3, 220) # print(type(all_city_info[city_idx[now_counter]]['weather']), # all_city_info[city_idx[now_counter]]['weather']) tmp = all_city_info[city_idx[now_counter]]['weather'] try: f_image = open(f'/{tmp}.dat', 'rb') for times in range(1, 81): buf = f_image.read(160) display.blit_buffer(buf, 150, times, 80, 1) except: pass time.sleep_ms(300) cnt = cnt + 1 # print(counter, BTN_A.value(), BTN_B.value()) past_state = now_state past_counter = now_counter past_all_city_info = now_all_city_info06 中断响应 中断响应对应按钮按下,此时只需要变化城市索引counter的值即可,代码如下: def INT_A(v): #A键中断响应服务程序 global counter, all_city_info counter = (counter + 1) if counter < (len(all_city_info) - 1) else (counter) # counter=(counter+1) print('INT_A')def INT_B(v): #B键中断响应服务程序 global counter, all_city_info counter = (counter - 1) if counter > 0 else (counter) # counter = (counter - 1) print('INT_B')07 图片的处理和显示 在本设计中,我们在屏幕的右上角显示了天气状况对应的logo,这就需要我们对原图进行一定的处理,这是本次设计的难点之一。由于硬件资源所限本次只搭载了部分天气的logo,如下: 我们使用python对这些图片进行rgb888转rgb565的操作后以两个字节为单位打包,写入二进制dat文件,具体代码实现方法如下: import cv2import numpy as npimport structimport osimport send2trashdef showme(img): cv2.imshow('test',img) cv2.waitKey(0) cv2.destroyAllWindows()def rgb565(r,g,b): return (r & 0xf8)<<8|(g & 0xfc)<<3|b>>3def main(): dir='weather_pics' # for file in os.listdir(dir): # if file.split('.')[-1]=='dat': # send2trash.send2trash(os.path.join(dir,file)) for idx,pic in enumerate(os.listdir(dir)): print(idx) img=cv2.imread(os.path.join(dir,pic)) # showme(img) img=cv2.resize(img,(60,60)) # showme(img) name=pic.strip('.png') with open(f'processed_weather_pics/{name}.dat','wb') as f: for line in img: for dot in line: f.write(struct.pack('H',rgb565(dot[2],dot[1],dot[0]))[::-1])if __name__ == '__main__': main()08 整体效果展示 初始化及城市信息载入界面如下: 城市气象信息展示: 09 总结与展望 本次是我第一次参加硬禾学堂的活动,也是我第一次参加开发板的程序设计工作。在本项目中我遇到了很多难题,比如时序问题、图片显示问题等,但最终都通过查阅资料和自己思考等方法解决了问题。虽然项目的基础功能要求已经达到,但该项目还存在可以提升的地方: (1)按键没有消抖。由于按键检测是用中断的方式进行检测,默认的中断嵌套规则为:如果中断响应中出现了新的更高优先级中断,那么执行更高优先级的中断,否则排队。这就使得按键消抖较为困难,一直没能实现。 (2)联网获取精确时间。本次项目中只实现了获取本地时间的功能而没有调用新的时间api接口联网获得实时时间。 (3)更加人性化的GUI交互界面。本气象台的功能仅限于左右改变城市,将来可以实现如手动设置时间、手动改变显示项的功能。
|

 [复制链接]


 闽公网安备35062302000276号 | 闽ICP备2024076463号-1 | 论坛技术支持QQ群171867948 | 论坛问题,充值问题请联系QQ1308068381


 再发某公司的PADS格式 PCB封装库全套共享
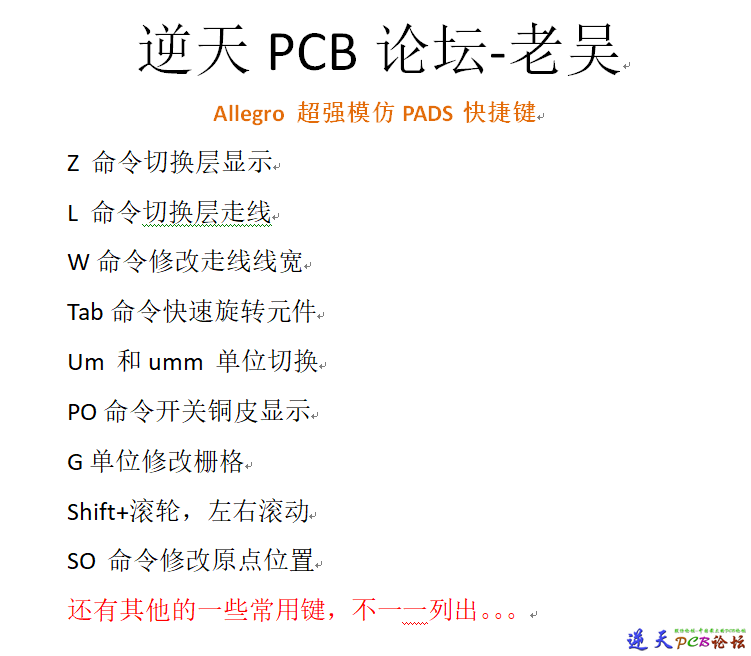 Allegro超强最全模仿PADS快捷键实现Z切换层
 EP4CE6E22C8N FPGA 最小系统核心板PCB和原
 BQ25792RQMR + TPS25750DRJKR+TPD8S300RUKR
 SSD SM2246EN 2.5英寸SSD的PCB原理图
 AD5391BSTZ-3 做的树莓派 4 专用 HAT 扩展
 STM32 做的MINI机器人PCB和原理图
 allegro羊皮卷
 RP2040 + ESP32:一个真正能联网的桌面气象
 山景BP2668Ax双核无线音频DSP,面向智能音
 炬力北方 HDMI网线/光纤延长|方案与选型要
 炬力北方 HDMI网线/光纤延长|方案与选型要
 炬力北方 HDMI网线/光纤延长|方案与选型要
 HDMI网线/光纤延长怎么选?先看这份参数卡
 基于XCZU27DR设计的18层射频采集与处理板卡
 JC-AGL-萃茶机升级版 控制板PCB文件
 瑞芯微RV1126B_HDK(20250613) PCB参考图纸和通用说明文档等
 基于官方EVK改进的HPM6880开发板 PCB和原理图
 40:1匝比的平面变压器
 AC6966B + JW4056 + LTK5328 做的蓝牙音箱 PCB文件共享
 STM32H750最小系统板,练习走线玩


 发表于 2026-1-6 10:47


 提升卡
 置顶卡
 变色卡(高亮)
 千斤顶
 照妖镜


 发表于 2026-1-6 17:24


